💻 My new deep learning setup
 Image credit: Screenshot from my computer
Introduction
Using my own computer for my personal deep learning projects is annoying:
- Limited usability: I can’t really use my computer for anything else while I train neural networks.
- Noise: I also can’t turn off my computer during training, which means prolonged periods of loud fan noise. To resolve this, I decided to explore how I could run my projects on a remote server. The result? I created my own website, allowing me to access an IDE [1] on the server. This way, I can code and train models directly from a web browser, anywhere, anytime.
Setting up this project took me about a weekend. In this post, I’ll walk you through the open source tools and tutorials I used to achieve this setup.
Step 1: choose a hosting service
The ideal server for deep learning applications should have:
- A GPU for backpropagation calculations
- Plenty of storage for large datasets
- Adequate RAM for visualisations
After reviewing several hosting providers, I chose Ikoula [2], a French hosting service, based on the following criteria:
- Location: Being hosted in the European Union, which ensures low latency and strong privacy laws.
- Transparent billing: I wanted a fixed monthly price for specified hardware, avoiding surprises from usage-based billing.
- Affordability: Since this is a hobby project, I didn’t mind using older hardware.
I selected the following server specifications: • Intel® Core™ i9-9900K @3,6 Ghz (8C/16T) • 64 Go DDR4 • 1 x 1 To SSD NVMe • GPU : GeForce GTX 1070 • OS : Ubuntu 22.04.5 LTS
While a GTX 1070 was released back in 2016, it should be sufficient for my needs. I don’t intend on training very large models. I opted for a bare metal hosting service [3], which means that I rent a physical server in a data centre and not a virtual machine or VPS [4].
Step 2: Access your server
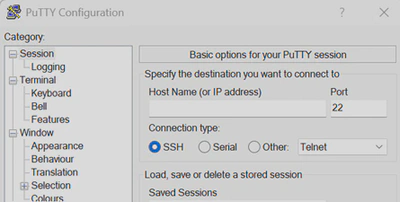
Putty
To remotely access the server, I used Putty [5], an open source SSH client. Once I received the root password from the hosting provider, I logged in and then created a user account, using the root account only when necessary.
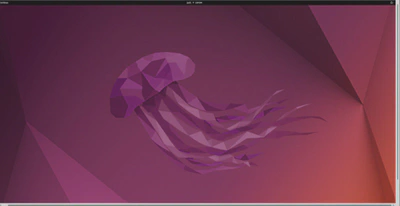
While working from the command line interface on Ubuntu is fine, I wanted to explore connecting to a remote desktop for a more familiar development environment. Unfortunately, as I anticipated, latency was too high to make this practical for actual coding. I upgraded the server to a desktop version of Ubuntu with this command line: ’’' sudo apt install ubuntu-desktop ’''
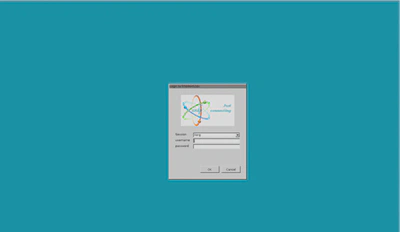
Remote desktop
Afterwards, I used the Windows 10 remote desktop application to log in and access the graphical interface. However, I’ll primarily access the server via Putty or through the website for future work.
Step 3: Install the server IDE
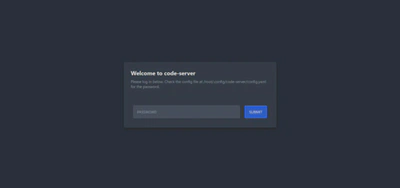
After experimenting with Jupyter Lab [6] and its notebooks, I chose to use code-server [7], a VS code [8] server that can be accessed via a web browser. I followed the installation instructions [9] and installed it using the provided script.
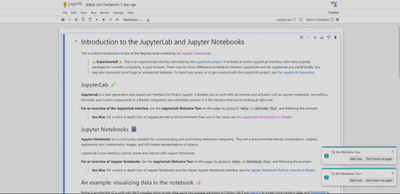
Once installed, code-server runs locally on localhost:8080. For security reasons, it is password-protected by default. If you decide to expose it to the internet, always ensure it is behind a password protection to prevent unauthorised access [10].
Step 4: Set up your website (optional)
While it’s possible to access code-server directly via its IP address, I opted to purchase a domain name from Spacesquare [11]. I selected the latter because it was recommended in a tutorial and used to be owned by Google. This is purely optional but using a URL is more user-friendly than typing an IP address. I also was curious about creating my own website, as I have never done it before.
I then configured the DNS [12] settings, in my Spacesquare account, to map my domain to the server’s IP address using an A record (since I have an IPv4 address). This allows me to access the server via my custom URL.
Step 5: Enable HTTPS
For security reasons, I decided to enable HTTPS [13] rather than HTTP, the former encrypts communication between the server and the client. Initially, I used a self-signed certificate generated with openssl [14], as I didn’t yet have a domain name. While browsers issue a warning about the certificate, it is perfectly safe for personal use. Once I registered my domain, I used Let’s Encrypt from Nginx [16] to obtain a valid certificate for the domain, following the steps outlined in the code-server documentation [15]. This allowed me to access the server over HTTPS.
Step 6: secure everything!
Since code-server provides privileged access to my server, I added an additional layer of security by configuring Nginx to password-protect the entire application. This is especially important if you haven’t changed the default password generated by code-server. I followed an online tutorial for this [17], and I strongly recommend others to do the same.
Step 7: connect your GPU
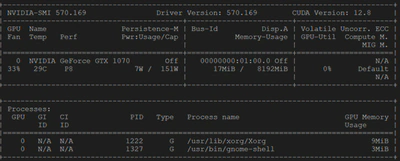
In order to utilise the server’s GPU, I needed to install the correct drivers. By default, the server came with Nouveau drivers (an open-source alternative to NVIDIA drivers) [18]. However, I needed the proprietary NVIDIA drivers for deep learning frameworks like Pytorch [19]. This process was more challenging than expected due to compatibility issues between older hardware and newer software versions. I manually selected the appropriate driver version from NVIDIA’s website [20] and installed it using updated compilers. After some trial and error, I was able to install the drivers successfully. I confirmed that everything was working by running the ‘‘’nvidia-smi’’’ command, which shows the current load on the GPU.
Step 8: Create virtual python environments
To manage my dependencies, I use Conda [22] to create Python environments. I installed the necessary Anaconda extensions in VS Code and followed the instructions to install Anaconda on the server [23].

Once Anaconda was installed on the server, I created a new environment using the VS Code command palette. I selected the desired Python version and was able to open a terminal with the corresponding Conda environment. I then installed the libraries I needed using pip [24].


Finally, I wrote a small script to verify that Cuda is available and to check which device is being used by PyTorch.
’’’ python
import torch
print(“hello world !”)
print(torch.cuda.is_available()) print(torch.cuda.get_device_name(0))
’’’

Conclusion
After setting everything up, my server is now fully configured to run deep learning projects efficiently, securely and remotely. The GPU is properly recognised and I can access everything through a web interface. This setup allows me to train models without worrying about overloading my personal machine.
References
[1] https://en.wikipedia.org/wiki/Integrated_development_environment [2] https://www.ikoula.com/ [3] https://en.wikipedia.org/wiki/Bare-metal_server [4] https://en.wikipedia.org/wiki/Virtual_private_server [5] https://www.putty.org/ [6] https://jupyterlab.readthedocs.io/en/latest/ [7] https://github.com/coder/code-server [8] https://code.visualstudio.com/ [9] https://github.com/coder/code-server/blob/main/install.sh [10] https://coder.com/docs/code-server/guide [11] https://www.squarespace.com/ [12] https://fr.wikipedia.org/wiki/Domain_Name_System [13] https://en.wikipedia.org/wiki/HTTPS [14] https://jupyter-notebook.readthedocs.io/en/6.2.0/public_server.html [15] https://coder.com/docs/code-server/guide#using-lets-encrypt-with-nginx [16] https://nginx.org/ [17] https://medium.com/@nickjabs/secure-your-app-with-nginx-basic-authentication-94db2d28d154 [18] https://nouveau.freedesktop.org/ [19] https://pytorch.org/ [20] https://www.nvidia.com/en-us/drivers/ [21] https://forum.ubuntu-fr.org/viewtopic.php?id=2085794 [22] https://www.anaconda.com/ [23] https://www.anaconda.com/docs/getting-started/anaconda/install#linux-installer [24] https://pypi.org/project/pip/